Need:
-Quantum Fighter Pad (Can use others but this tutorial is written for them)
-Wire
-2 single mercury switch/s
-Glu-Tack
Intro:
You could use any controller for this but fighter pads are the best as they have wires connecting everything unlike a Sega controller, which is just one board that could be a pain to solder onto. There are 2 types of mercury switches as shown in the Fig 1.1 and 1.2. I used a single switch one like in Fig 1.2, but only because the shop was out of double switch ones (Fig 1.1). I think the single switch ones work better though as they can be placed on angles to suit the way you hold the controller.

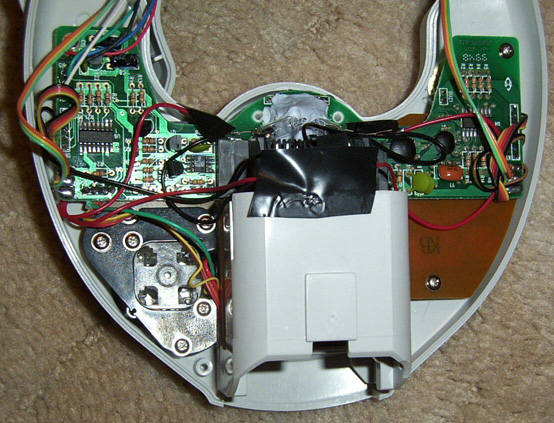
Method:
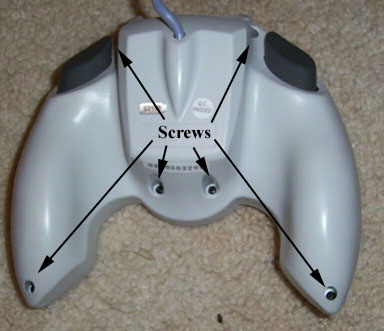
Take the cover off your controller by taking all the screws out of the back.
You will also need to take off the main board by unscrewing the 2 screws found on the edges of the board. Do not rip it off hard as wires are connected to it under the board.
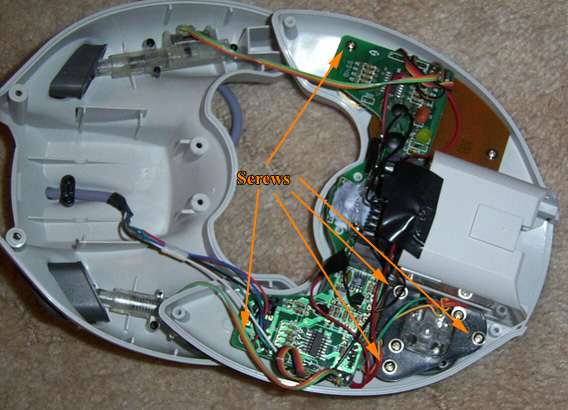
Under the main board you will find a smaller brown board on the right side of the VMU slot, unscrew it and take it off.

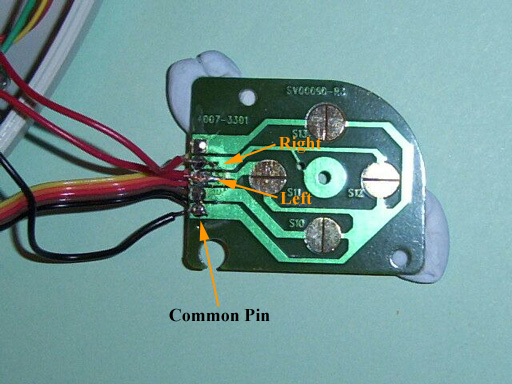
I find it best to sick the board to a piece of wood using glu-tac. You need to solder onto the board with can a bit fiddley once you can get the wires to stay still its not hard at all. Again I would recommend using glu-tack to hold the wire in place while you solder it. You need to solder 3 points. Firstly you need to solder a wire to the common pin. It's the black wire goes to on the end. Next you need to solder wires to the red and orange points. The orange wire goes to the right on the D-pad. This connected to the common pin makes the controller signal that the right button has been pressed. The red wire is left on the D-pad.
Now that the wires are soldered onto the board you can screw it all back into place along with the analogue stick and the main board.
The wire that goes to the common pin needs to be spliced into 2 at some point because we are using 2 directions. (Left and Right)
Now you need to solder the wires to the mercury switches. Each mercury switch needs to go to the common wire and either left or right.
I found the best place to put the mercury switch is behind the start button. Now you need to place the mercury switches behind the start button. Make sure their at an angle and once again I used glu-tack to keep the switches angled up
You really need to mess around with the positioning of the switches, it does make a difference and it took a few tries until I found a good angle that suits the way I hold the controller.
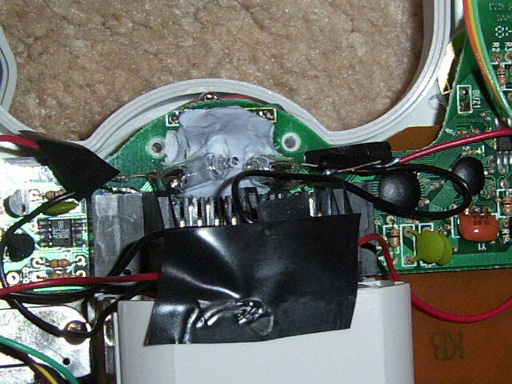
Clean up the connections and make sure no wires are connecting to anything else. Wrapping the ends up in electrical tapes makes sure this doesn't happen.
Now put the lid on. and you finished.
Additional: If you want to put a switch on, so you can switch between tilt and D-pad, all you need to do is put an On/Off switch on the common wire BEFORE its spliced into 2.
For more information vist: http://www.dcemulation.org/phpBB/viewtopic.php?t=32052&highlight=
|