History
V. 1.0 Guide completely redone
Equipment
- LED that supports 3.3 volts of any color*Soldering IronSolderPhillips head screwdriverDreamcast ConsoleNeedle Nose PliersWire clippersOptional: Exacto Knife
- Optional: A desoldering tool
* Make sure it can ran at 3.3 volts. I blew two LEDs because they were only rated for 3 volts.
Disclaimer:
I am not responsible of what you do with these directions, nor responsible for what it can do to your dreamcast, controllers, or anything else that is in your possession.
Directions:
1) Remove any wires attached to your Dreamcast, and also remove any CD in your Dreamcast.
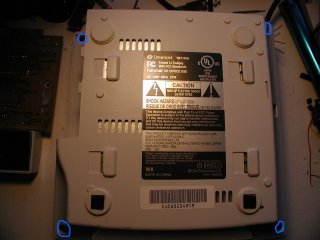
2) Turn your Dreamcast over and remove the modem.
3) Remove the four screws. Make sure to keep these in a safe place!

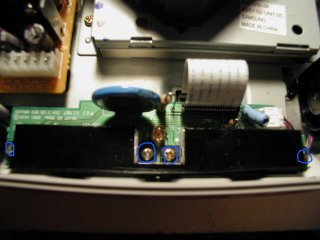
4) Flip your Dreamcast back over and lift off the top. 5) Unscrew the four screws holding the controller board. Make sure to keep these in a safe place!

6) Remove the fan connector and controller board connector. Use the pliers to slowly remove the controller board connector.

7) Remove the controller board, and set it upside down. 8) You have two choices on how to get the old orange LED out. I prefer method A.
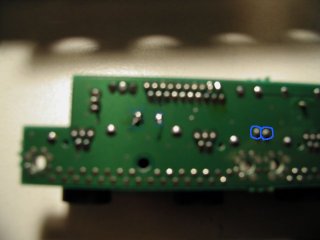
8a) Carefully put your soldering iron on the two points shown in the picture. Take your desoldering tool and remove the solder. You should now be able to remove the old LED.
8b) Place your soldering iron carefully onto the two points shown in the picture. While doing this take your pliers and carefully pull on the LED. It should come out. **

9) Put your new LED in. Make sure your anode (the longer leg) is to the left. (The side where controller port 1 and 2 is)
10) Make sure your LED is in as far as it can. Solder each leg into place. Clip the extra wire coming from it.
11) Set the controller board back into your Dreamcast, put the 4 screws back again. Carefully plug the fan wire and controller board wire back in. Use your pliers to make sure it is snug. 12) Place the top back on the Dreamcast and screw in the four screws. Plug in your modem.
13) Attach all the cords to your Dreamcast. It should work! If it doesn't then check your soldering joint.
Notes/problems **
When I was removing the Old Orange LED I had a hard time to say the least. But the issue I had is I pulled to hard without the wire being hot enough and some of the copper circuit came off of the board on the LED side. Heat the wire as much as possible and forget about salvaging the LED, even though it will probably work no matter what you do it. If you're worried that they might also have some copper circuit come off as well, then they might want to take an Exacto Knife and cut it off as close to the LED as possible, it would be better than the alternative, which is what I had to experience. Luckily it didn't rip off all the way to underneath the control ports. That would have had to be soldered off as well if such a thing had happened. Luckily for me I only had to melt some solder to the control port and draw it in a line to the led hole. Very difficult however. Thanks:
DC_Warrior - Wrote the original guide
Psyerjock - Wrote the notes
Here is a picture of one done!

|
