Materials: omni folder (paper folder or some sort of thin tough flexible material)Eight thin pieces of metalLots of wireThick piece of corrugated cardboard. (like from a box)Paper towelsElectrical tape.Spare Dreamcast controllerSafety Pin (not used as a part of the final product it just helps to have one handy)
Step 1. First cut out eight 1 1/2”x 4” pieces of the folder
Step 2. Next take the small thin pieces of metal and solider or wrap a wire around them.
Step 3. Take a paper towel and make a small roll. About the size of your thumb.
Step 4. Tape the thin pieces of metal in the middle of all of the 1 1/2x4 pieces of thin cardboard.
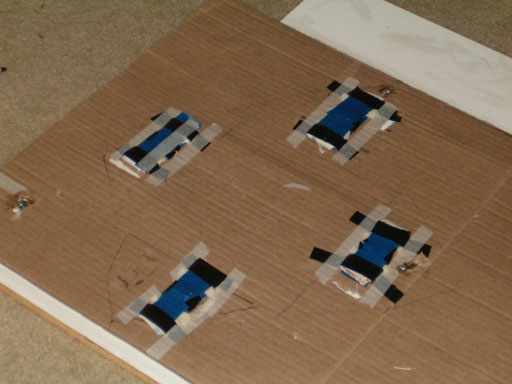
Step 5. Make four of the things that looks like this out of the rolled up paper towels the 1 1/2x4 pieces of cardboard with the metal on them and tape them together.


**make sure that when you press down on the “pad” that the two thin pieces of metal make contact with one another.**
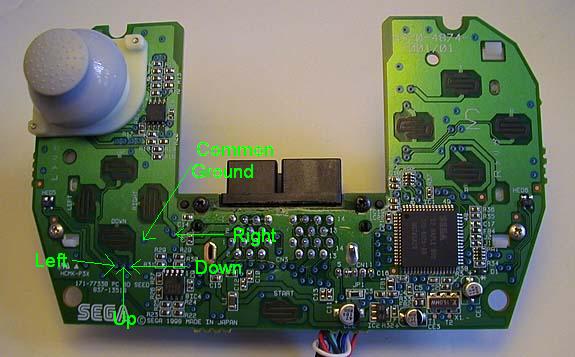
Step 6. This is the tricky part, take the spare dc controller apart. Be careful to not destroy anything. The little blue circles with the dot in the middle is your target. Take the safety pin and poke at the middle of the blue circles this is just to make it so you can fit a small wire through them. For the DDR pad we're just going to use the ↑ ↓← and →.
Step 7. After poking the holes with the safety pin run a small wire through the hole. Color coding your wires at this step would really make things go easier later on.
Step 8. After running the wires through the holes you can either solider them on the opposite side or place a piece of electrical tape over them so they don't go any where.
Step 9. Now it's time to find a way to get the wires that you just placed on the controller board out of the controller. The only way I can suggest is to cut a small notch under where the chord for the controller comes out.
Step 10. This is the step where color coding wires will be helpful. Once you have the wires out of the controller, hook your common ground up like so on the bottom of the piece of corrugated cardboard.

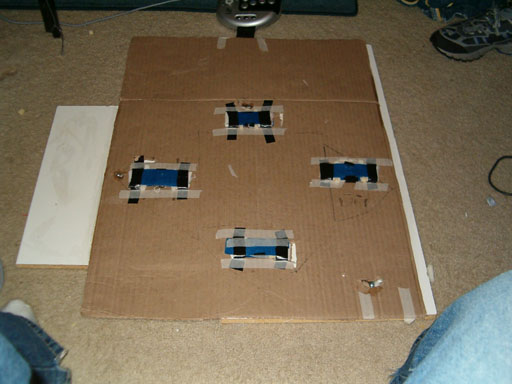
Step 11. After connecting the common d-pad ground to the bttom of the foot pads, connect the wires from the directional pad (up down left and right) to the top half of the foot pads.
Step 12. cut notches to put the pads through the cardboard so you don't have wires hanging on the top of you dance mat.
Step 13. the finial step is to test out your work load up DDR in training mode pick any song and look up at the arrows. When you hit the direction the arrow should jump. You'll know it when you see it.
Step 14. I didn't want to end up with 13 steps so the real final step is to have fun and never stop modding!
 
This is a pic of my ddr pad after i made a plug for it so i can plug it into my home made arcade controller. and dont even ask for a tut for my arcade controller it would probably be about 20 pages long.
Note from Prophet][: This mat may not look that spectacular but it would be really easy to give it a good look. Just put some plastic over the top, give it a little paint and find the offical ddr mat artwork on the net and you have a really good lokking mat.
|
